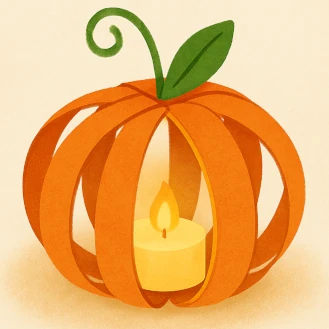
DIY Paper Pumpkin Lantern 🎃
🎃 Perfect choice! The DIY Paper Pumpkin Lantern is a cozy and creative craft — great for fall, Halloween, or Diwali decorations 🍂🕯️.
Here’s a complete, ready-to-publish Craft Content for your Hello Curious Brain Craft Section 👇
🧰 Materials Needed
- Orange and green construction paper 🎨
- Scissors ✂️
- Glue stick or double-sided tape
- Ruler 📏
- Pencil ✏️
- LED tealight candle (battery-operated for safety) 🕯️
- Hole punch (optional)
- Green pipe cleaner or ribbon (for stem and handle) 🎀
🟢 Step-by-Step Instructions
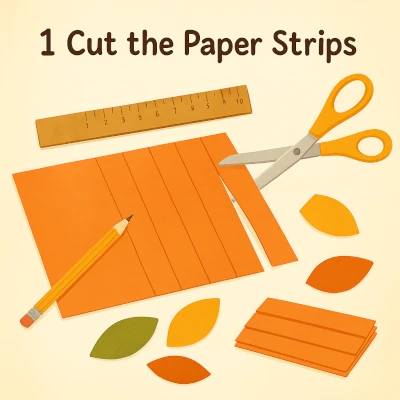
1️⃣ Cut the Paper Strips
- Take an orange sheet of construction paper and cut it into even strips (about 2 cm wide).
- You’ll need around 8–10 strips for one lantern.
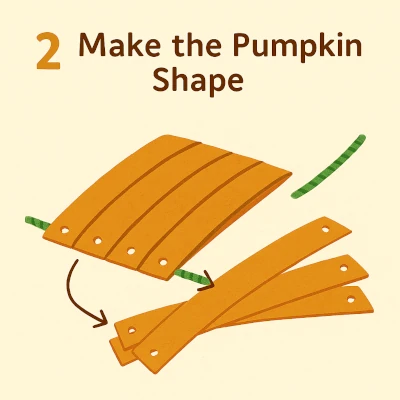
2️⃣ Make the Pumpkin Shape
- Gather all strips and stack them together.
- Punch holes (or carefully poke with a pencil) on both ends.
- Insert a green pipe cleaner or ribbon through the holes.
- Gently spread the strips to form a round pumpkin shape! 🎃
3️⃣ Add the Stem and Leaf
- Twist the ends of the green pipe cleaner on top to make a stem.
- Cut out a small leaf from green paper and glue it near the stem. 🍃

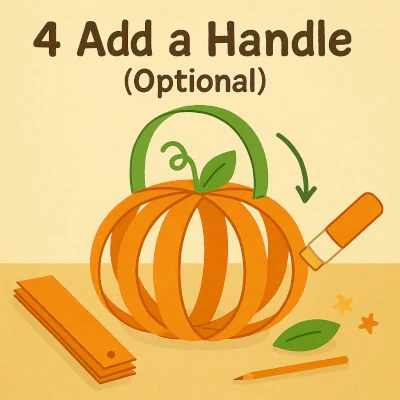
4️⃣ Add a Handle (Optional)
- Use another piece of ribbon or paper strip to make a handle for hanging.
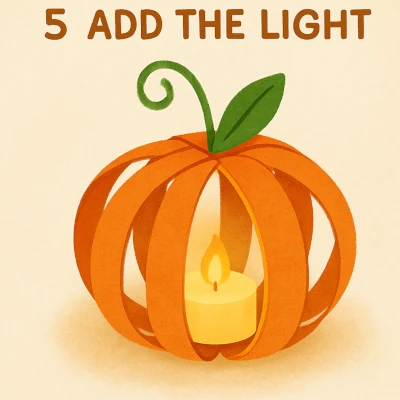
5️⃣ Add the Light
- Place a battery-operated LED tealight inside the lantern for a soft glow. 🕯️
- Your pumpkin lantern is ready to shine!
🎉 Final Touch
You’ve made your very own Paper Pumpkin Lantern! 🎃✨
Turn off the lights, switch on your LED candle, and enjoy the magical glow. 🌟